Quick Start (from Marketplace)
So you've heard about DiscrimiNAT, and would like to take it for a test drive? This is the page for you!
Here you'll find easy instructions on how to deploy a brand new VPC in AWS, secured by the DiscrimiNAT Firewall for egress traffic filtering right from the onset, and instructions on how to evaluate its capabilities in order to see if it fits your business needs.
Contact us for expert help at devsecops@chasersystems.com at any stage of your journey – we'll jump on a screen-sharing call right away!
i. MARKETPLACE SUBSCRIBE
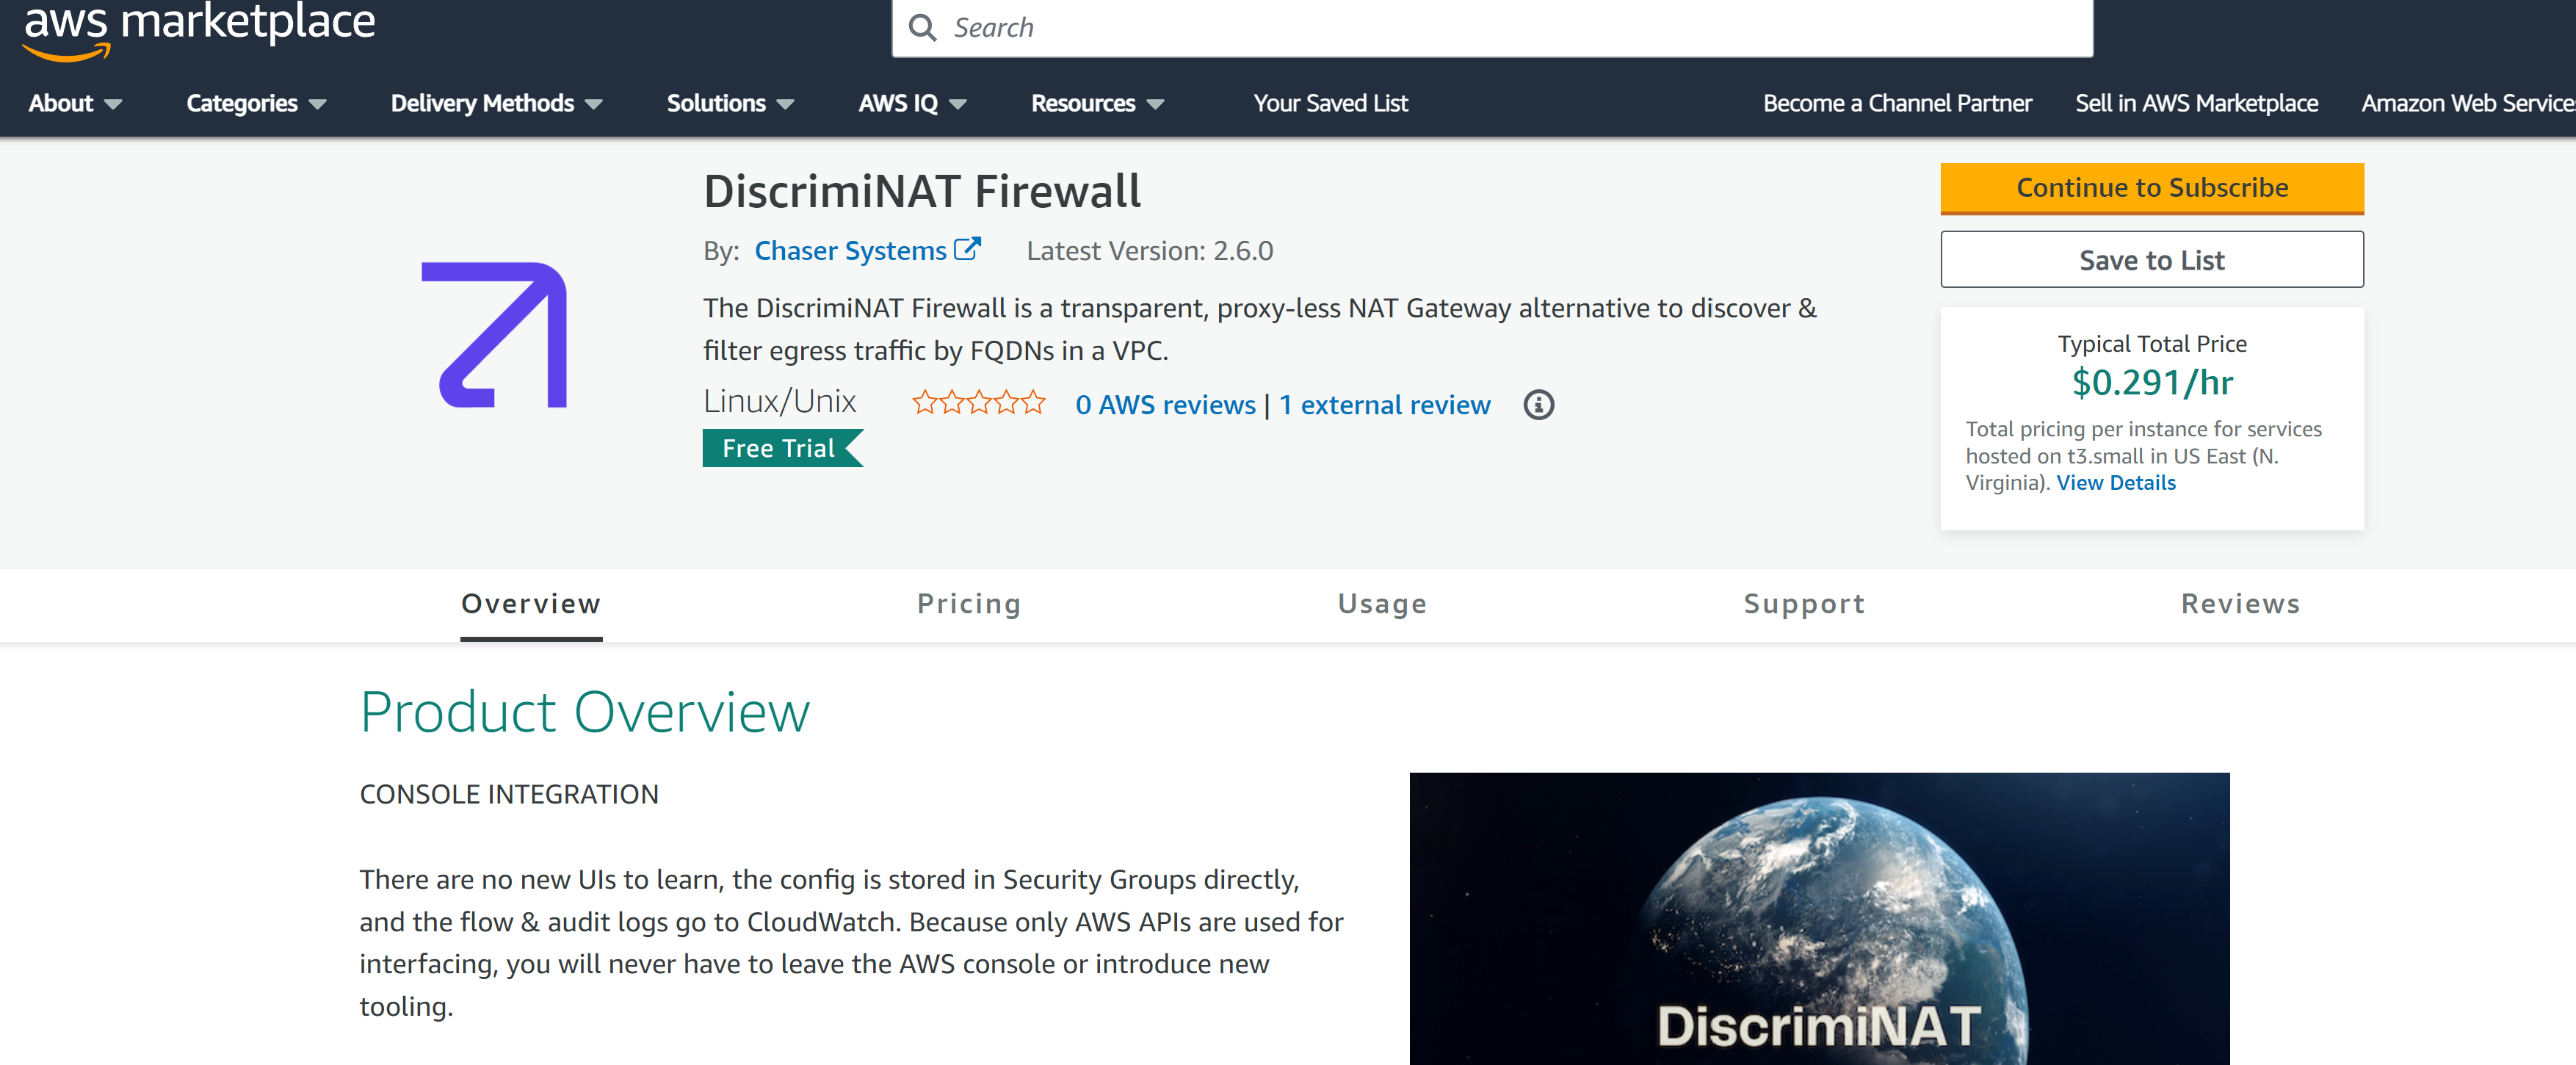
Proceed to our AWS Marketplace page and click the Continue to Subscribe button. This step is entirely self-service.
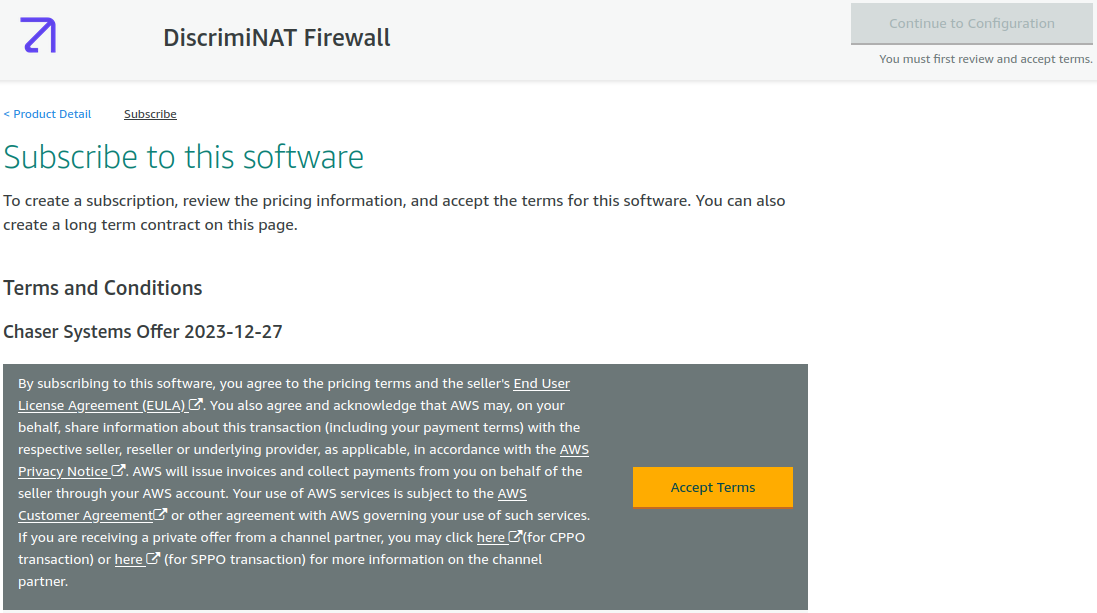
You will need to press the Accept Terms button next and wait until it's ready for configuration.
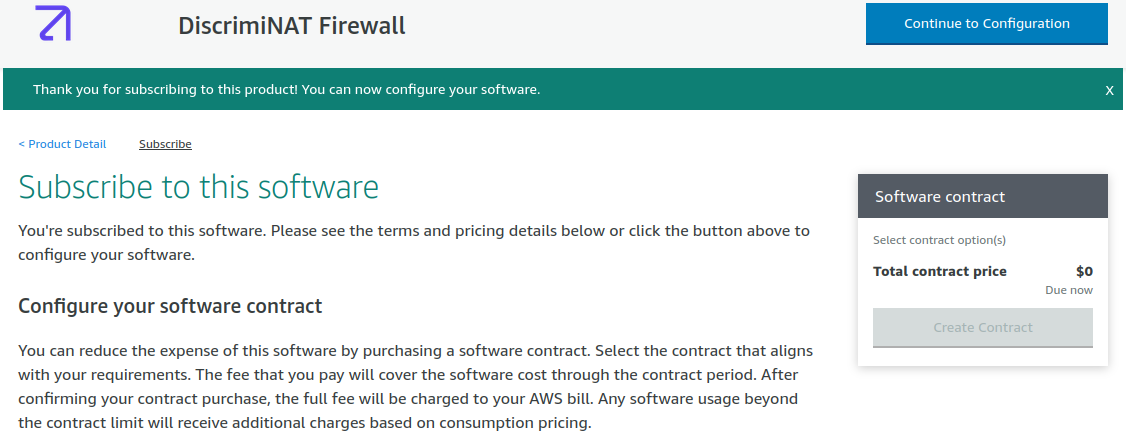
Once ready, do not proceed with the configuration, instead read on and press the Launch Stack button present in the next section here.
ii. CLOUDFORMATION TEMPLATE – DEMO ENVIRONMENT
If you have deployed through Terraform or are considering, you may jump straight to Configuring a Whitelist.
Our self-service demo (using CloudFormation) includes a couple of instances to make it easy to evaluate the capabilities of DiscrimiNAT.
Ensure you are logged into the AWS console and have selected the intended region for the demo before you click the following button.
![]()
iii. STACK PARAMETERS
Contact us for expert help at devsecops@chasersystems.com at any stage of your journey – we'll jump on a screen-sharing call right away!
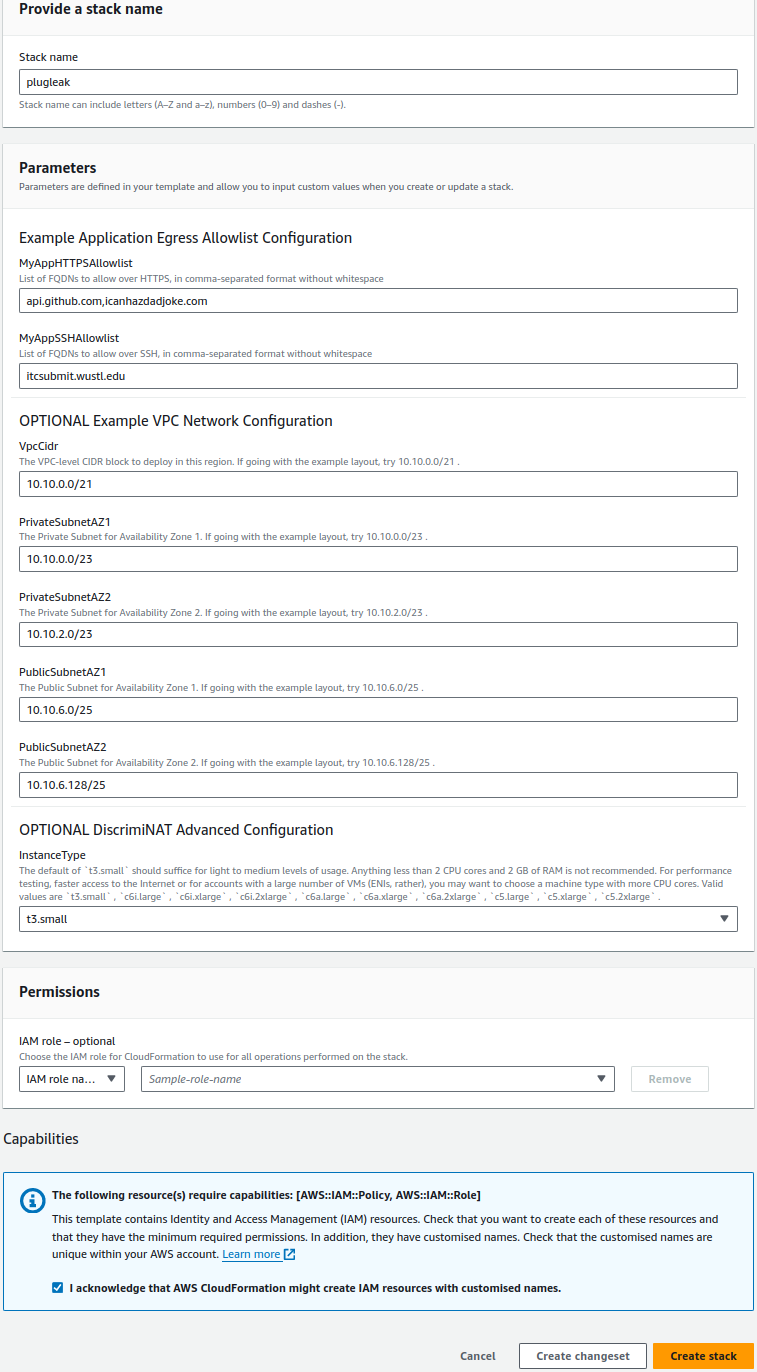
You may want to change the Stack name, everything else has safe defaults.
Stack name: This is a unique identifier for your deployment. In our case, and the case of this documentation, we have chosen plugleak. This name will prefix a lot of the resources that the stack will create. If you choose a different name and are following this demo through, don't forget to replace plugleak with your-chosen-name in the relevant steps.
EXAMPLE APPLICATION EGRESS ALLOWLIST CONFIGURATION
This section contains optional customisation for the demo whitelist.
MyAppHTTPSAllowlist: A comma-separated list of domains (without whitespace) that you wish your demo app to be able to connect to via a HTTPS or TLS connection. Note: Most services now use TLS for end-to-end encryption. It's not just for web page traffic, this also covers a number of other services such as SMTP, Databases, Kafka, etc.
MyAppSSHAllowlist: A comma-separated list of domains (without whitespace) that you wish your demo app to be able to connect to via SSH. Note: This will also cover SFTP, SCP and GitLab/GitHub runners.
Feel free to change these to whatever you like, but for the rest of the documentation for this demo, I'll assume you left the defaults in place. If you're following along and have changed these, don't forget to substitute the domains shown for your domains.
OPTIONAL Example VPC Network Configuration
If you wish to customise the network configuration, you can do so here. But it is not necessary for the purposes of this demo. The fields are fairly self explanatory, but I'll briefly describe them now.
VpcCidr: The VPC-level CIDR block to deploy in this region.
PrivateSubnetAZ1: CIDR for the Private Subnet in Availability Zone 1.
PrivateSubnetAZ2: CIDR for the Private Subnet in Availability Zone 2.
PublicSubnetAZ1: CIDR for the Public Subnet in Availability Zone 1.
PublicSubnetAZ2: CIDR for the Public Subnet in Availability Zone 2.
OPTIONAL DiscrimiNAT ADVANCED CONFIGURATION
InstanceType: this, by default is set to t3.small. This is completely adequate for the purposes of this demo, as it will only require a small instance. In production, we'd suggest a more powerful instance type. Valid values are t3.small , c6i.large , c6i.xlarge , c6a.large , c6a.xlarge .
The default of t3.small should suffice for light to medium levels of usage. Anything less than 2 CPU cores and 2 GB of RAM is not recommended. For performance testing, faster access to the Internet or for accounts with a large number of instances (ENIs, rather), you may want to choose a machine type with dedicated CPU cores.
Finally, just tick on the checkbox that says I acknowledge that AWS CloudFormation might create IAM resources with customised names then click on Create stack and the stack will begin to build.
iv. SMALL WAIT
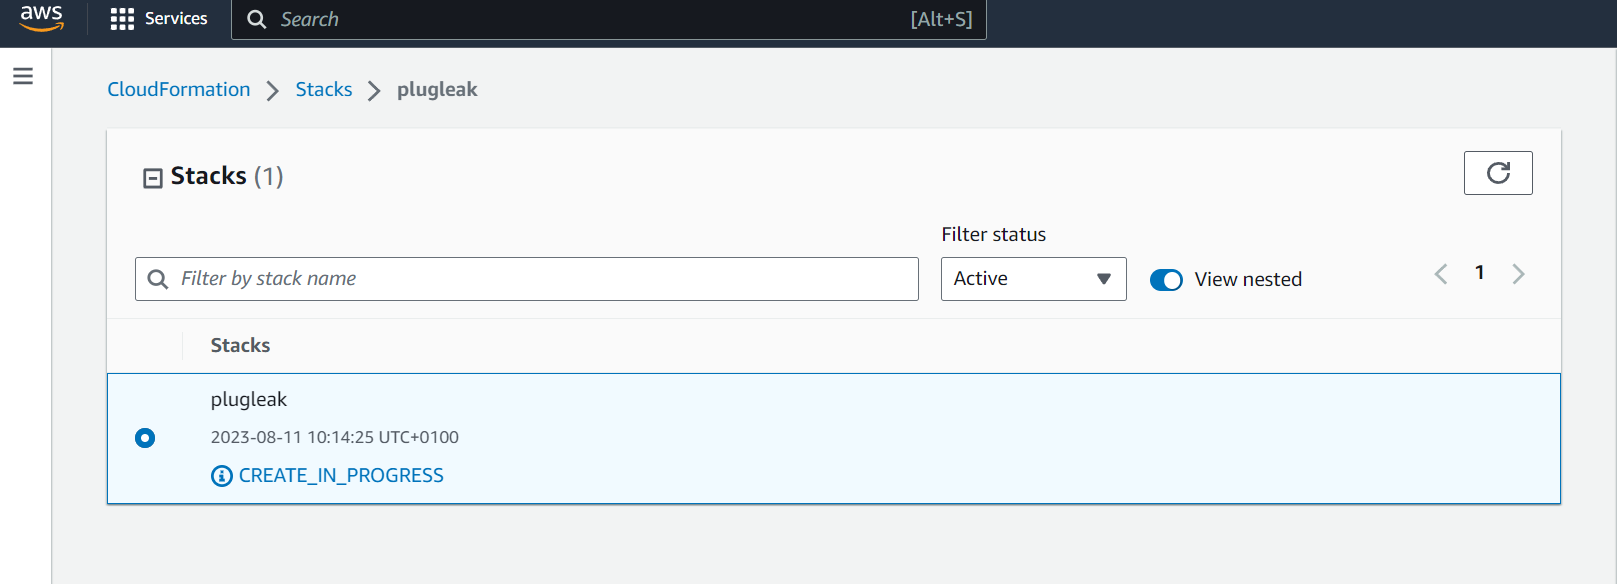
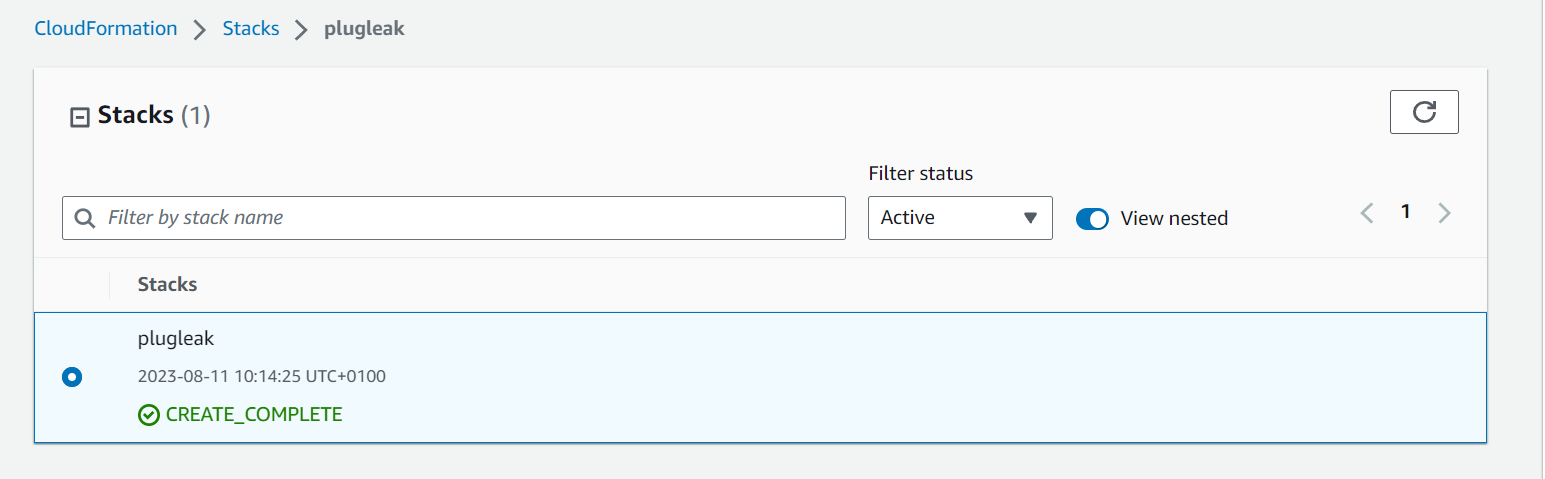
The stack is now being deployed, it should only take a few minutes, and assuming your IAM permissions are correct, it should complete successfully like so:
We will be using AWS Session Manager to connect to demo instances later, and due to a race condition between when the DiscrimiNAT Firewall comes up and when the SSM agent checks its connection, it could be around 5 minutes after creation before you're able to connect to them due to the agent back-off time period, so it is advisable to wait a few minutes after creation before continuing.
v. OVERVIEW OF WHAT'S BEEN CREATED
v(a). THE ARCHITECTURE OF DiscrimiNAT INSIDE THE VPC
The very short version is DiscrimiNAT replaces your NAT Gateways. If that's all you want to know, feel free to jump to section v(b) otherwise, let's take a look.
First you'll see we have the VPC which has both private and public subnets. These subnets are set up with the CIDR ranges given by the stack variables. You'll also see the route tables for the public and private subnets
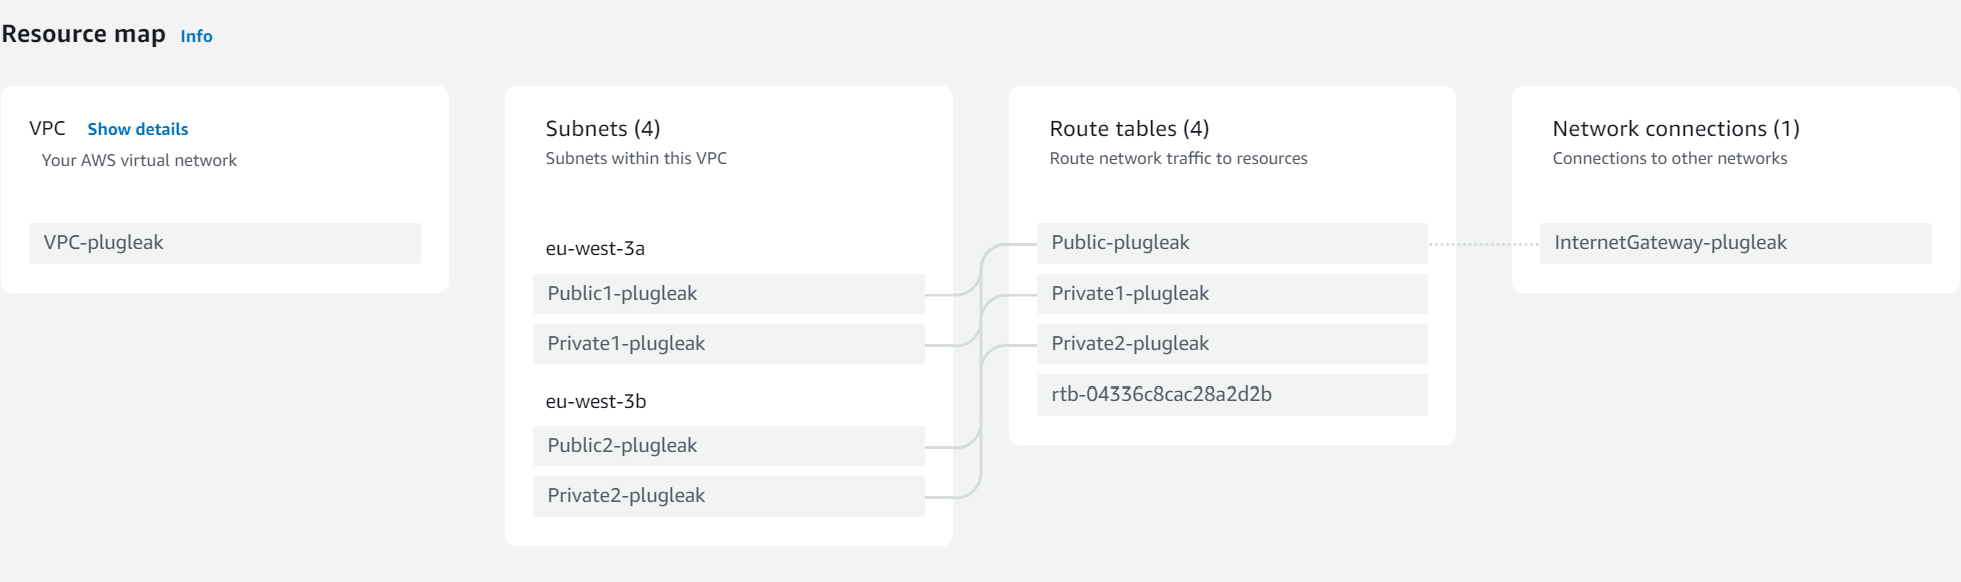
You can see from here that the public subnet route tables go through the Internet Gateway as usual. This is also where the DiscrimiNAT instances sit, much like NAT Gateways.
However the private routing is slightly different, so lets take a look at the private route tables.
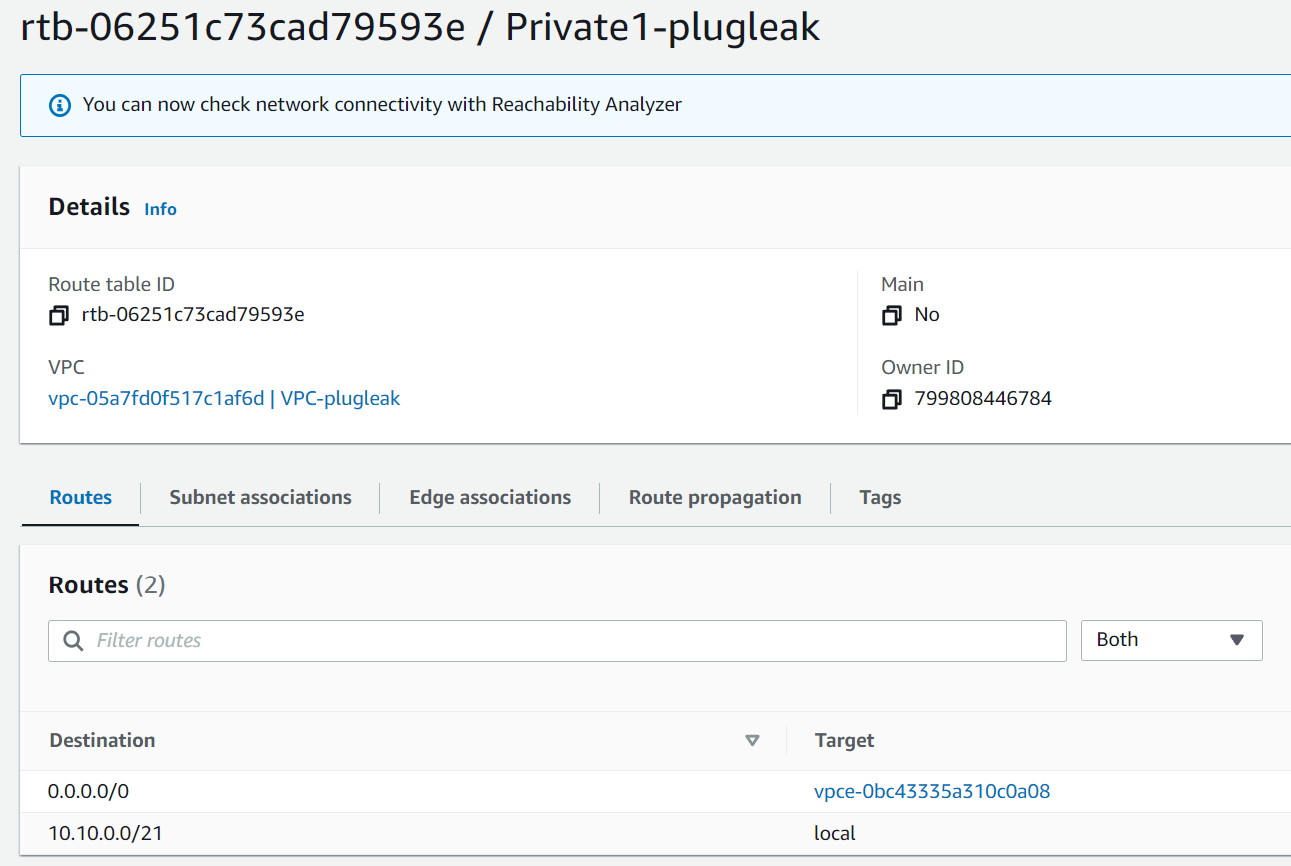
As we can see here the route to 0.0.0.0/0 is going out via a VPC endpoint.

And that endpoint is a GatewayLoadBalancer (GWLB) type.
Due to the way GWLBs and AWS Networking interact, GWLBs require a VPC Endpoint per subnet.
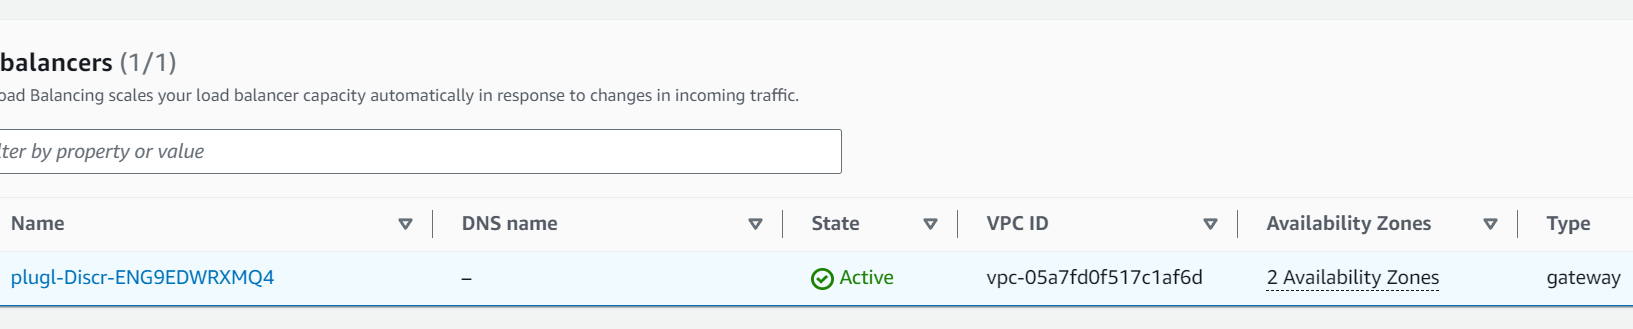
Looking in Load Balancers under EC2 we see that there is only one in this VPC and it's of type gateway.
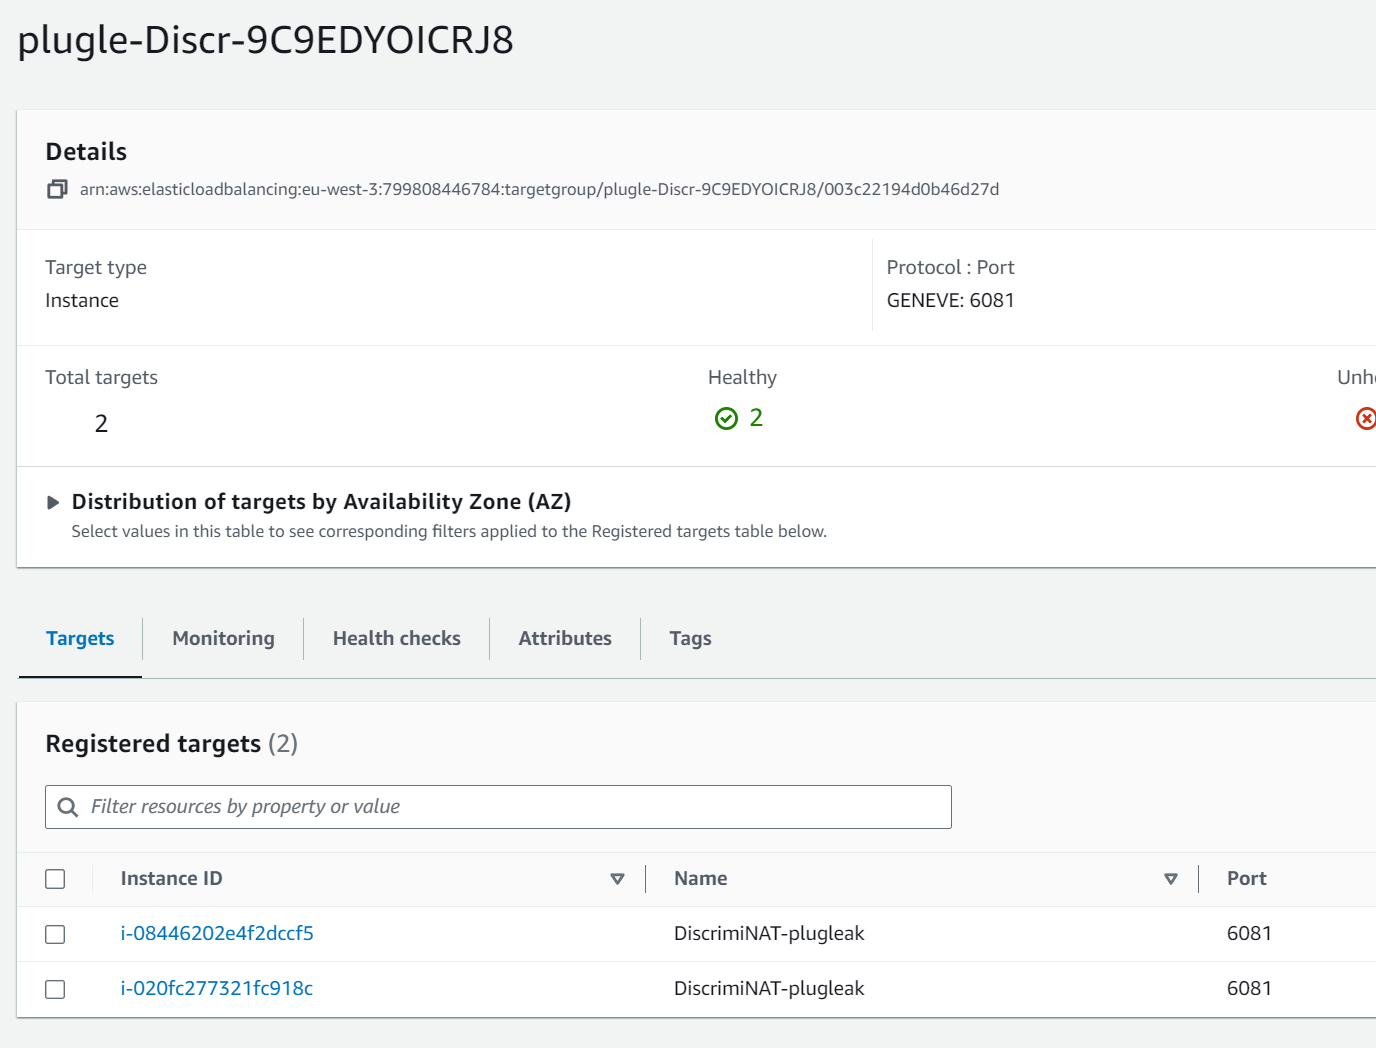
And looking at the load balancer, it's forwarding to this target group, which contains the DiscrimiNAT instances.
The short version of this is the following:
The private subnets (where your protected instances will live) route via a VPC endpoint to a GWLB which then forwards on to the DiscrimiNAT instances. This means that, unlike other architectures, if a DiscrimiNAT instance becomes unhealthy there will be no break in service while it's replaced. You can read more about this in our 99 Problems but Load Balancing ain't one blog post, or the Reference Architectures page.
An even shorter version is that functionally, DiscrimiNAT replaces your NAT Gateways.
You can run NAT Gateways along with DiscrimiNAT, but you will be both double NATing and paying for extra services. We haven't found a practical benefit to running both.
v(b). The demo environment
Looking at the instances we can see there are 4 instances here.
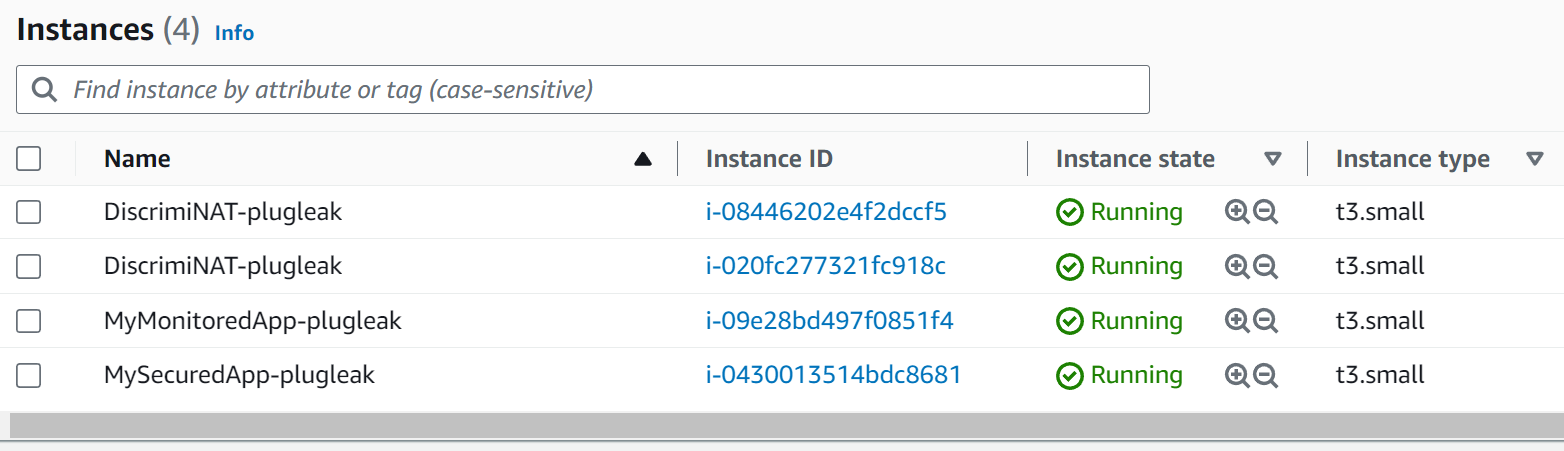
The top two are instances of DiscrimiNAT Firewall, but we also have two other instances. These are here to emulate protected instances.
MySecuredApp-plugleak: This instance has whitelists applied to it, both for TLS traffic and SSH traffic. We will look into how this is done shortly.
MyMonitoredApp-plugleak: This instance has been put into our see-thru mode which allows you to monitor the traffic the instance is generating without affecting the connections in any way.
Monitoring, or see-thru mode, is exceptionally useful in the discovery phase of your implementation. Unlike a lot of solutions, we allow you to examine the traffic going out, so you can add what's needed, know if needed rules are present, and then switch over to a secured mode with confidence. See our video guide 🎥 on that here.
vi. CONFIGURING A WHITELIST
vi(a) LOCATION AND SYNTAX
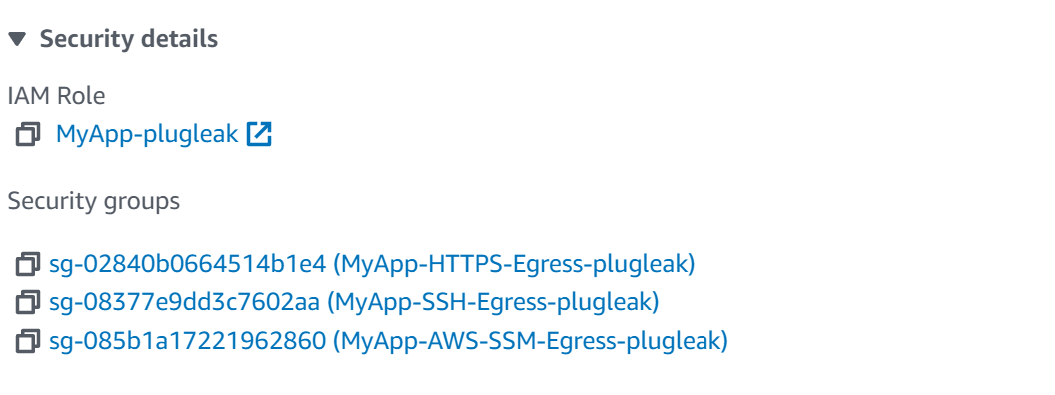
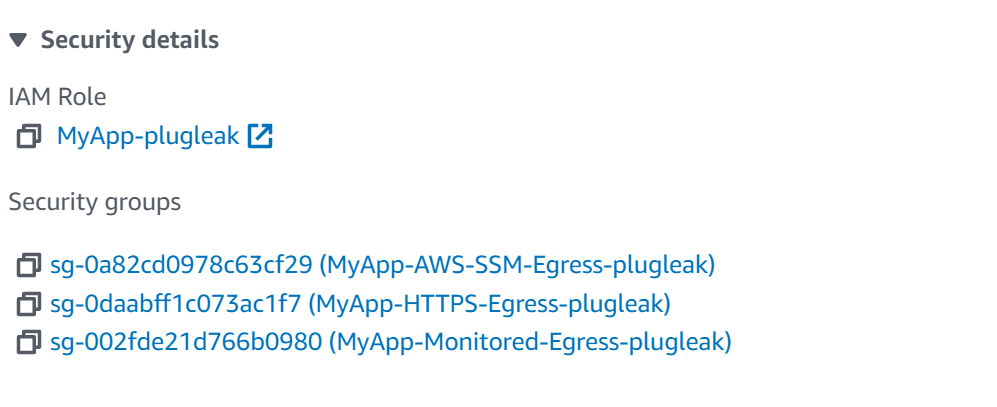
If we look at the instance called MySecuredApp-plugleak we will see it has three Security Groups attached.
DiscrimiNAT checks what domains each instance is allowed to access by seeing what Security Groups are attached to the instance, and then looking at the description of the Outbound Security Group Rules. Let's take a look at one.
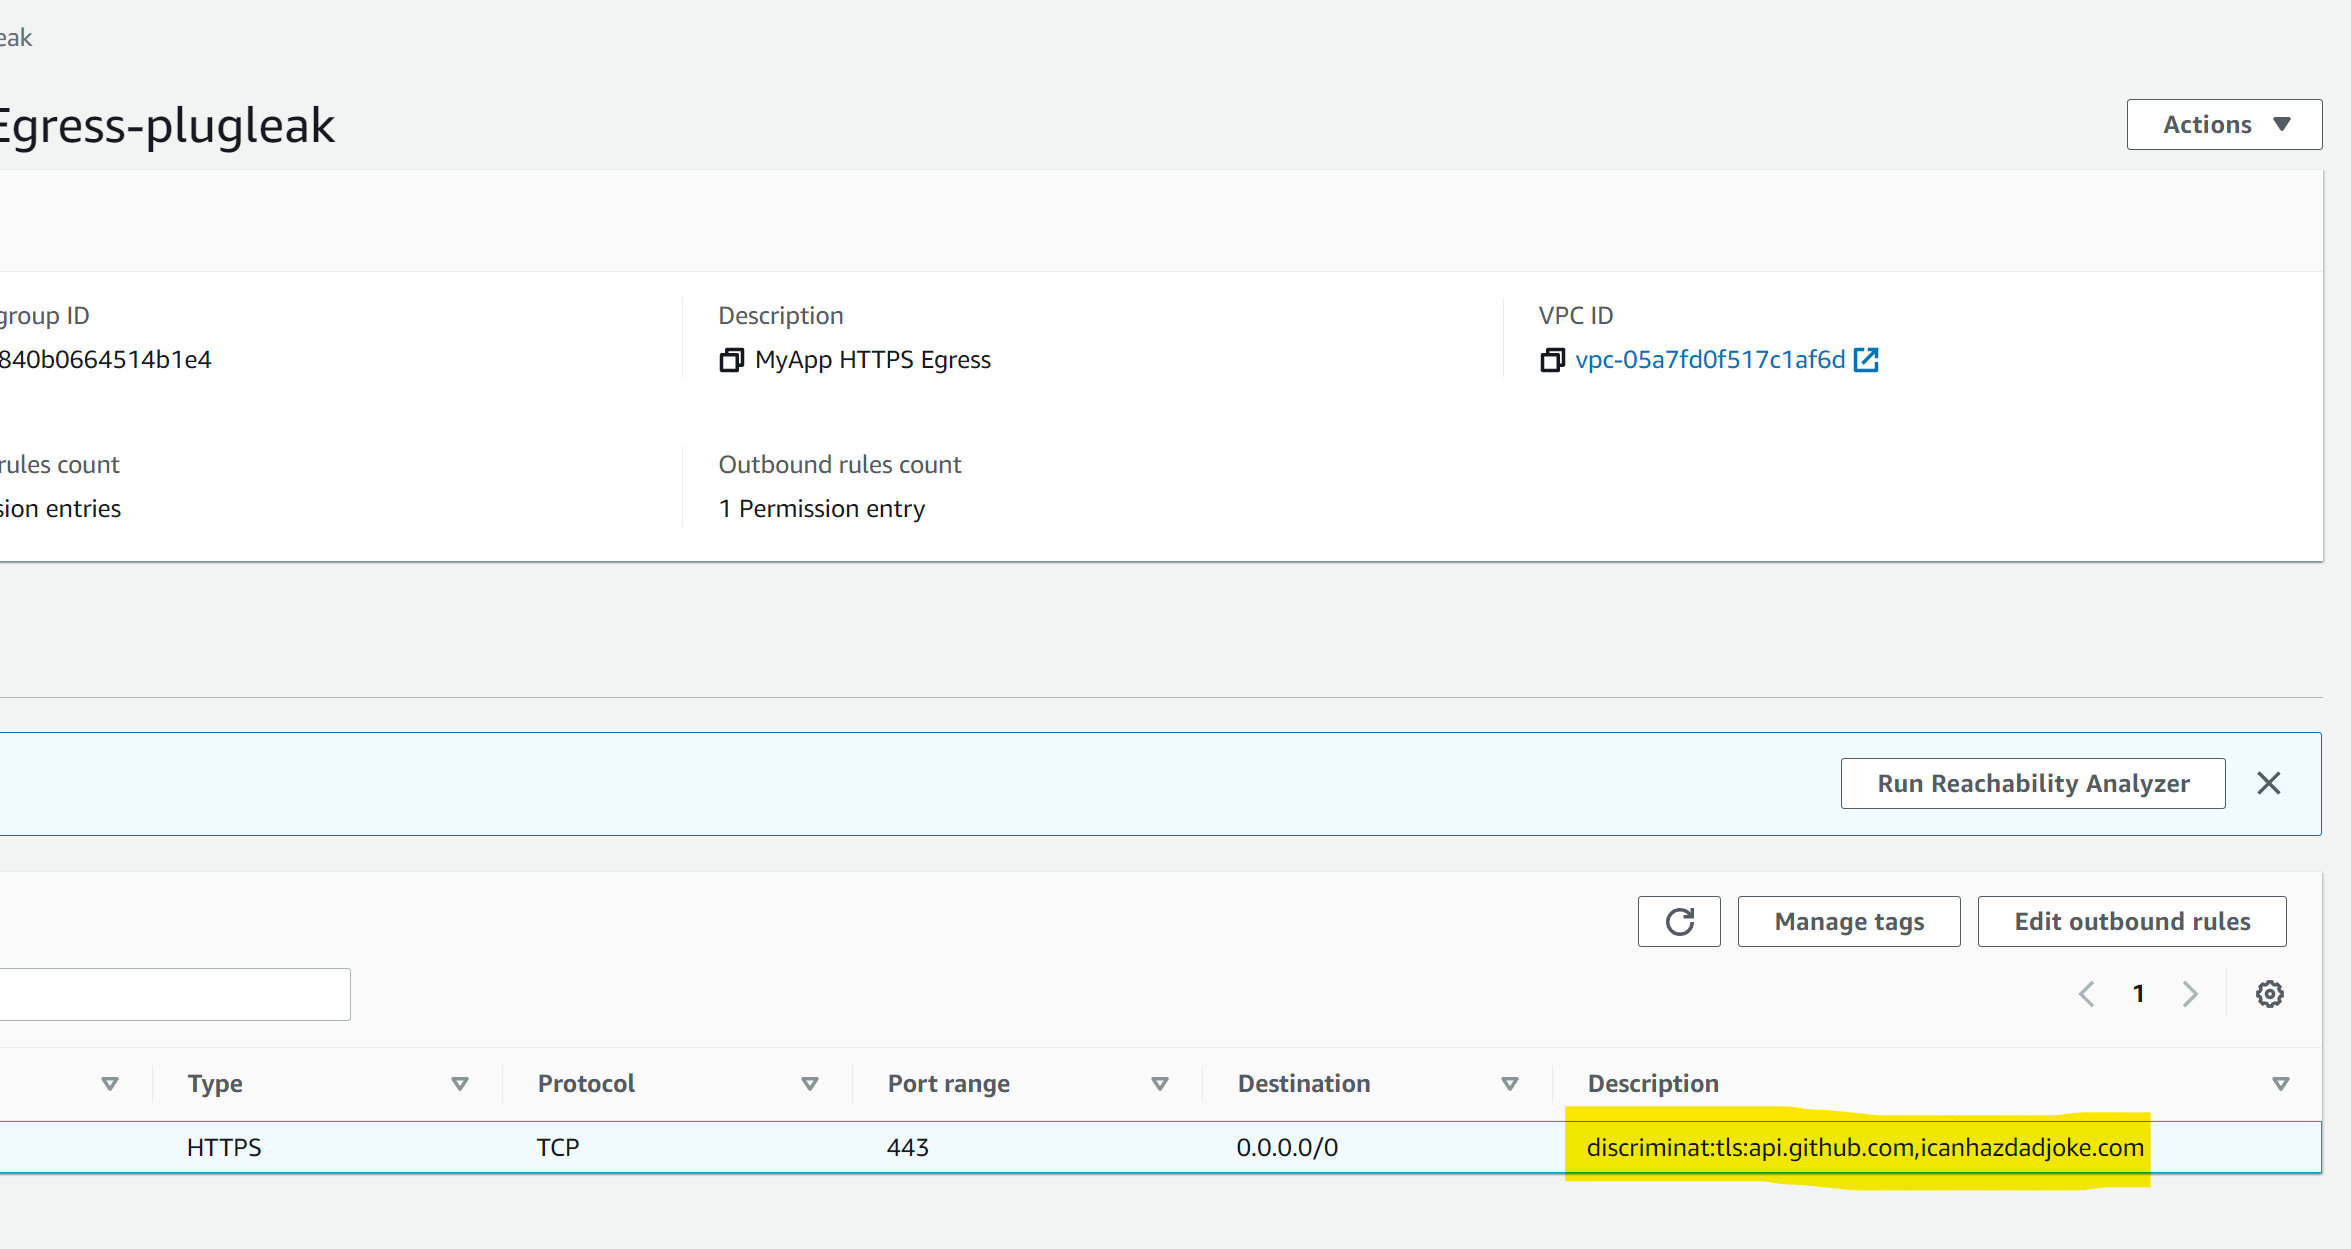
If we look at the highlighted section more closely, we can see that the outbound rule has text in the description field. Specifically some colon-separated values. This is where DiscrimiNAT reads its config from.
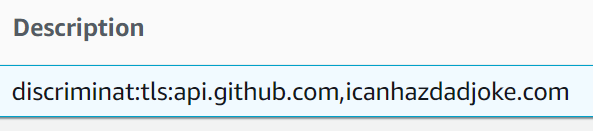
We can break this down as follows:
discriminat: this tells DiscrimiNAT that this description field should be parsed and the rules found within should be applied to anything attached to this Security Group.
tls: this tells DiscrimiNAT that this is for TLS connections rather than SSH.
api.github.com,icanhazdadjoke.com: this is a comma-separated list of domains that any instance attached to this Security Group can have access to. Alternatively, this list can be stored in an SSM Parameter in JSON format.
As you can see, this allows for least-privilege whitelisting, each instance only needs to have the list of domains that it needs to access in its whitelist.
We encourage you to create Security Groups as you would normally. Tight in scope and attached to their respective applications.
vi(b) EFFECTIVE USE OF DiscrimiNAT USING SECURITY GROUPS
This section is to give you a basic grounding on how to configure Security Groups for use with DiscrimiNAT, if you are simply interested in going through the demo, you can carry on to section vii.
For an effective use of the DiscrimiNAT Firewall:
Add destination protocols and FQDNs to the description field of each outbound rule. The format of this text is
DiscrimiNAT:<protocol>:<fqdn>[,<fqdn>]. Alternatively, the list can be stored in an SSM Parameter in JSON format.- Valid protocols are
sshandtlsonly. - There can be as many FQDNs as you can fit separated by commas. There cannot be whitespace, though.
- Valid protocols are
Some examples of what can go in the description field:
DiscrimiNAT:TLS:api.foo.example.com,downloads.example.netDiscrimiNAT:SSH:sftp.txs.example.org,ssh.github.com
All DiscrimiNAT rules must be under
Outbound rules. Inbound Rules are not read.Under
Type, choose any TCP protocol type and specify exactly one port number inPort range. Multiple ports, ranges, other protocols, and so on are not supported.- For your typical HTTPS outbound connection, the port number would be
443. - A typical SFTP connection has the port number of
22.
- For your typical HTTPS outbound connection, the port number would be
Destinationmust be set to the narrowest IP block you can think of. Now if you don't have anything narrower than0.0.0.0/0that is absolutely fine! The firewall takes care of validating the destination IP address of actual packets in many ways, but the Outbound Rule at the AWS networking and security level must allow the packet to leave the EC2 Instance.0.0.0.0/0is a safe choice with the DiscrimiNAT Firewall in the way.That's it! Although you may want to check the full reference for more possibilities.
vii. DiscrimiNAT IN ACTION
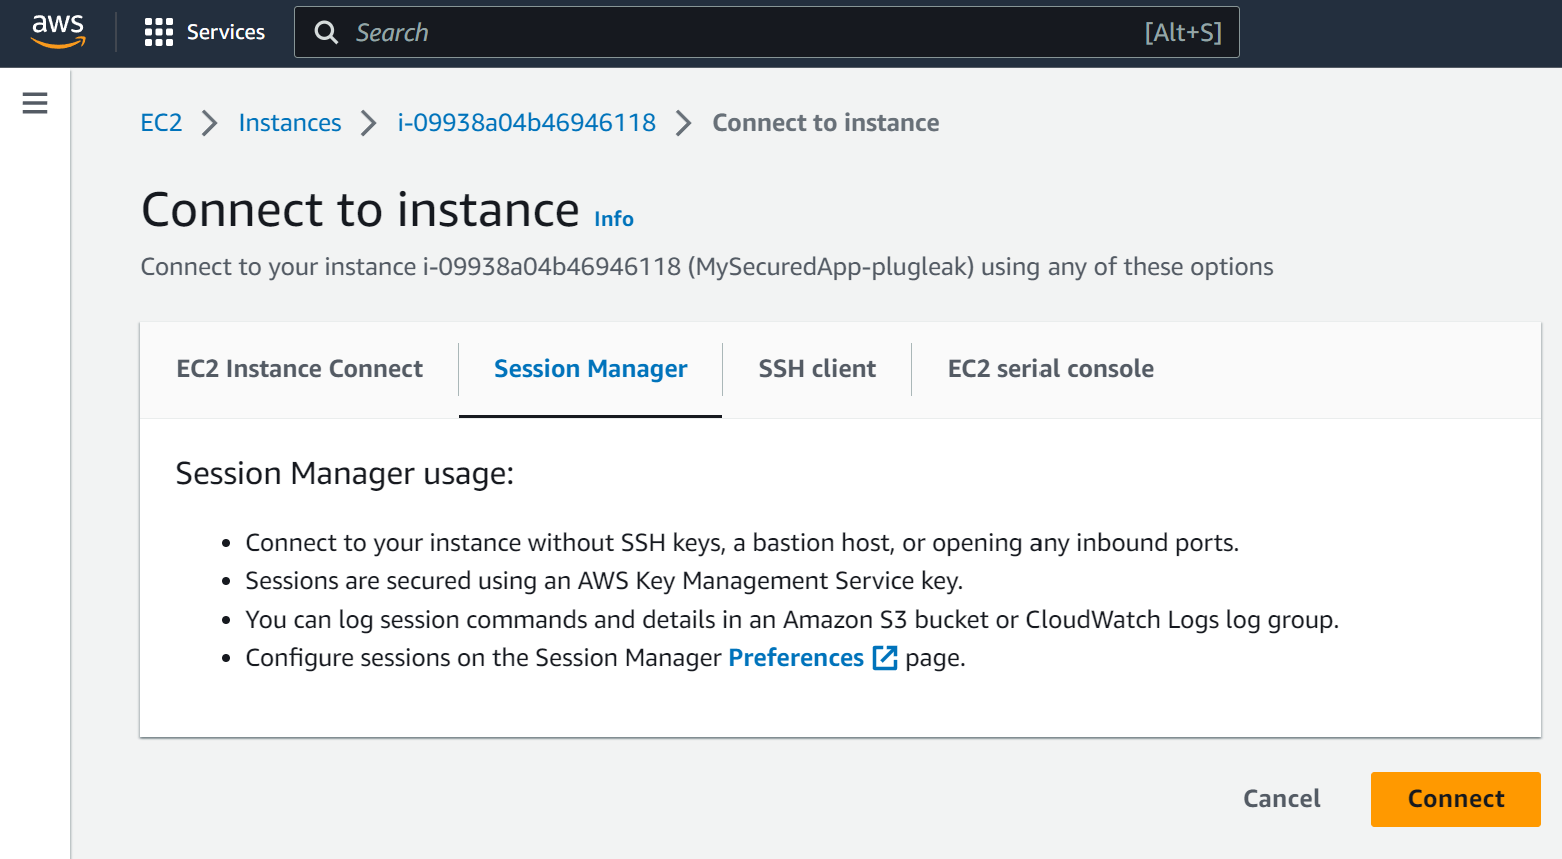
Now we're going to connect to one of our instances using AWS Session Manager. In the AWS EC2 console, find the instance called MySecuredApp-plugleak and click on its name, then click on Connect.
It is advisable to wait for over 5 minutes after stack creation to do this, as the SSM agent might not have had the time to reconnect. The instances come up at the same time as the DiscrimiNAT instances in this CloudFormation stack and there can be a race condition as described earlier.
On the next page, ensure you have chosen to connect via Session Manager. If this is disabled, wait for a few minutes for the agent to reconnect.
Now we're connected, let's test curling to an FQDN we have configured in the whitelist. Then let's test an FQDN we haven't configured in the whitelist.
First run curl https://istio.io (an FQDN not in our whitelist). We will immediately see a connection reset. This is because the rules attached to this machine do not include this FQDN.
We give a connection reset rather than a hang as it gives fast feedback to developers. A hang (drop & timeout), especially if connecting to multiple domains, or the same domain multiple times, can waste developer time or stall applications.
Now run curl https://icanhazdadjoke.com (an FQDN in our whitelist) and we'll see a dad joke appear in the command line because this FQDN is allowed.
Chaser Systems are not responsible for the quality of dad joke you are given. Dad jokes are read at your own risk.

Let's take the view that our organisation has decided they need this machine to be able to connect to istio.io. It's been agreed by everyone, so let's add istio.io to our Security Group Rule Description to add it to DiscrimiNAT's config.

We will now need to wait around a minute for the rule to be picked up.
DiscrimiNAT polls the AWS API at 1-3 times a minute, and as there is no global store, each instance picks up the config individually, so new rules usually take around a minute to go live.
The lack of a global store means no databases are required and makes the machines stateless and easily replaceable.
Now we will try curl https://istio.io and we'll get a very large HTML response.
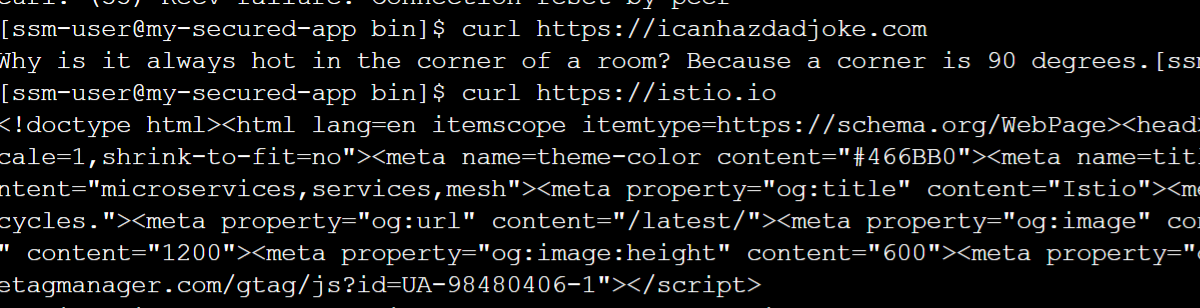
As you can see, DiscrimiNAT is simple to configure and does exactly what it's supposed to do.
However one thing we haven't shown you yet is something most of our competitors can't do. And that is: Combat SNI Spoofing.
SNI Spoofing put simply is when an attacker attempts to make a connection by claiming they're connecting to a specific DNS host in TLS SNI but are actually using an IP address completely unrelated to that domain name.
A lot of firewalls just check to see if the TLS SNI contains the correct domain name, without checking whether the IP is actually valid for that domain name. The other competitors that do check the IP is valid are prone to false positives, and the destination only works some of the time.
DiscrimiNAT combats this using our proprietary Wormhole DNS technology.
One of the simplest ways to spoof SNI is to edit the hosts file, so let's do that.
- Run
sudo vi /etc/hosts - Once the file is open press the o key.
- insert the following line
1.1.1.1 istio.io - press escape then the following keys :wq! then return
Now, when you try to curl https://istio.io, it will use the IP address in the hosts file (which is a Cloudflare IP) instead of doing a DNS query. Lesser firewalls would let this through, but DiscrimiNAT won't.

As you can see, DiscrimiNAT has blocked the traffic instantly. It will even report on this on the logs. Talking of which...
viii. HOW DiscrimiNAT LOGS WORK
DiscrimiNAT has no UI of its own, instead it ties into your cloud service, so in this case we'll be looking at CloudWatch.
DiscrimiNAT can send its logs to wherever you need, and can support most Linux-based logging agents such as Splunk, Rapid7, etc.
In CloudWatch, browse to Log Groups -> DiscrimiNAT -> flow. The flow log shows all hosts going through the DiscrimiNAT instances and whether the traffic was allowed out or not, along with some other information. Let's search in here specifically for istio.
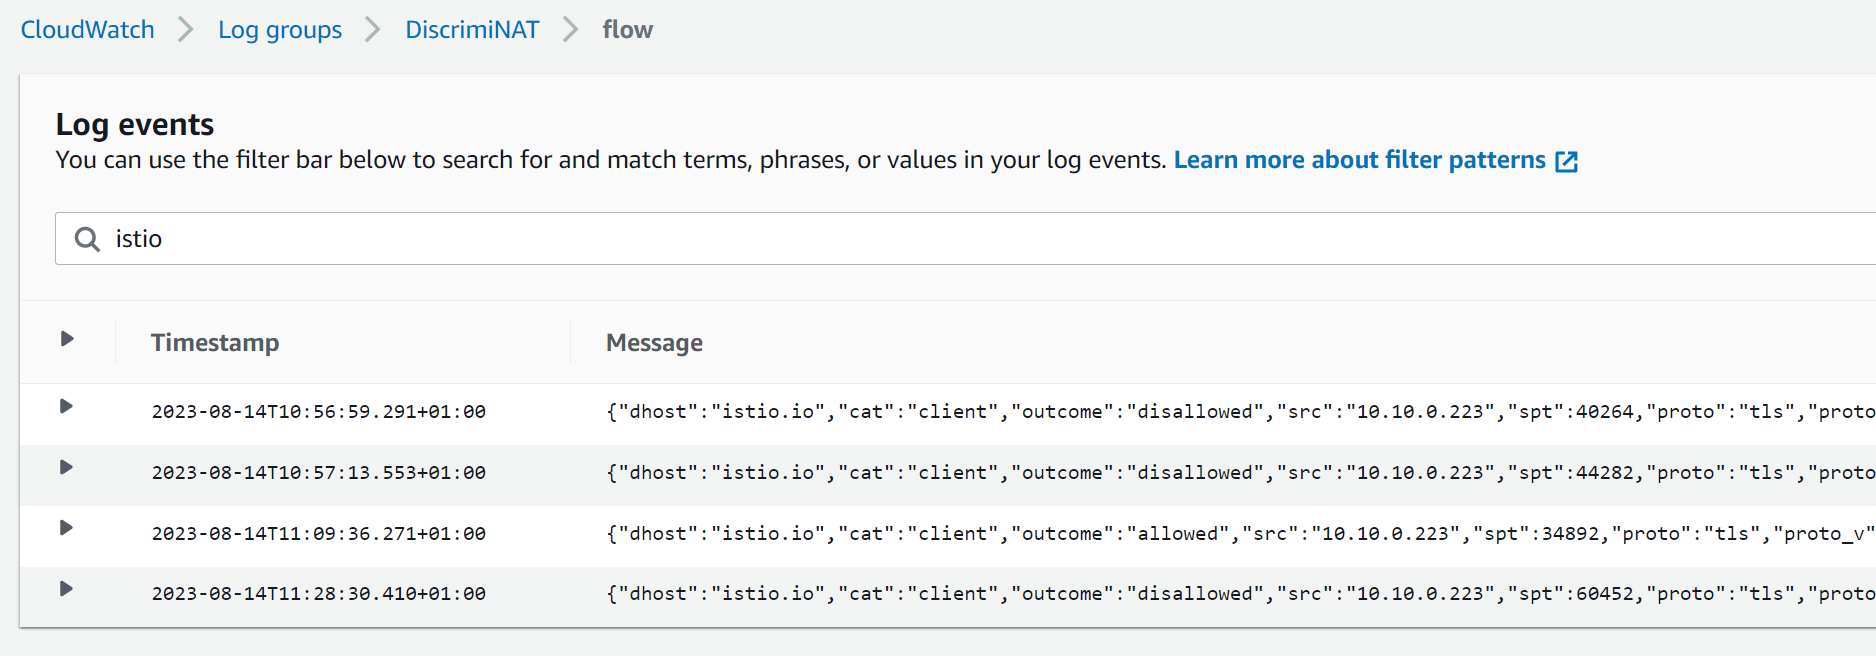
You should see at least 3 results here, one where you curled at first and it was disallowed, one after the rule was in place and it worked, and one where we tried to SNI spoof. Let's look at these one by one.
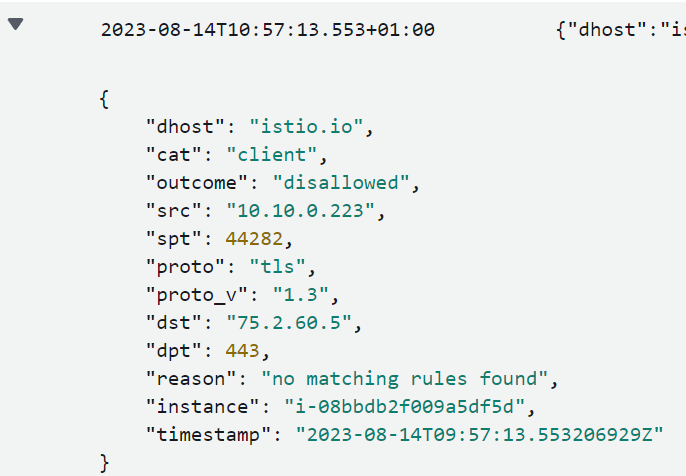
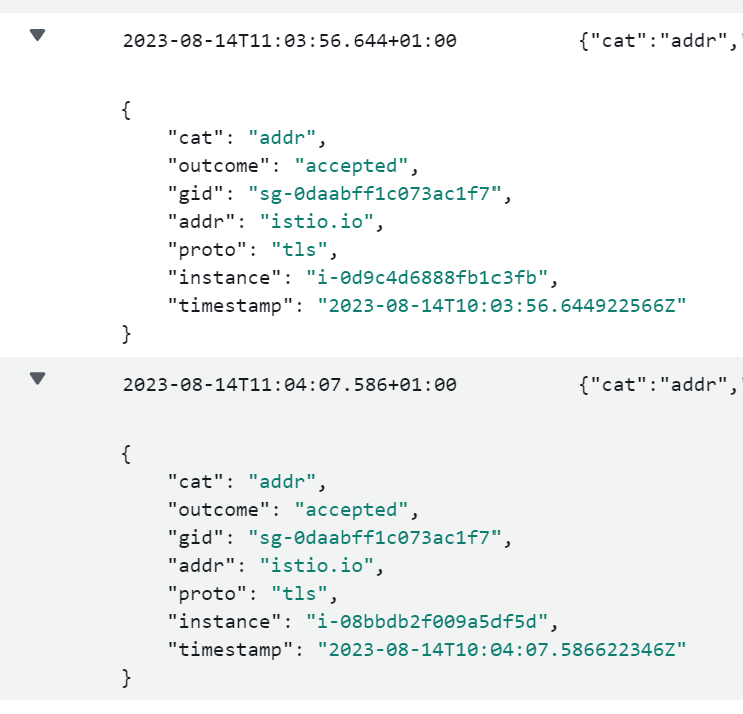
We can see here that this was an attempt to connect to istio.io that was disallowed and the reason is because there were no matching rules found.
Now let's have a look at the working one.
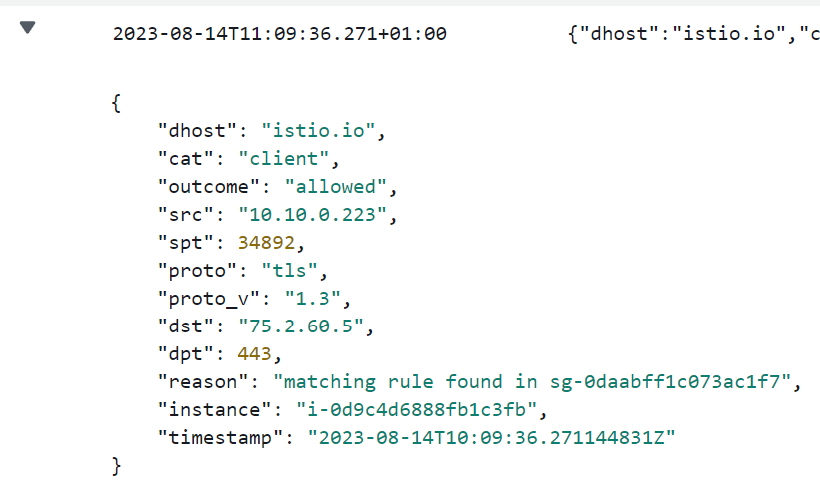
We can see here that this was an attempt to connect to istio.io that was allowed and the reason is because there was a matching rule in Security Group sg-0daabff1c073ac1f7 that was attached to the instance.
So let's take a look at when we tried to trick the firewall into letting spurious traffic through.
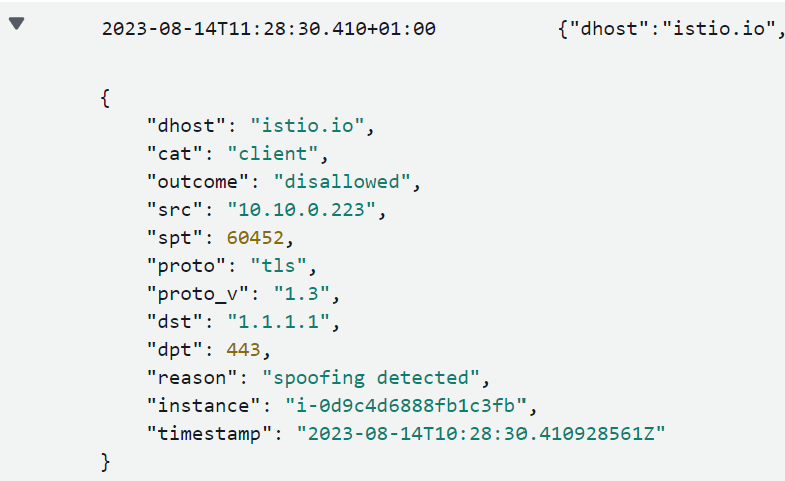
We can see here that this was an attempt to connect to istio.io that was disallowed and the reason is because there was spoofing detected. As you can imagine, this is something your security team would be very interested in as it indicates an exfiltration or a C2 attempt.
Let’s now look at the configuration logs. Browse to CloudWatch -> Log Groups -> DiscrimiNAT -> config. Here we can see any config changes and errors. For example here we can see our istio rule being picked up by both DiscrimiNAT instances.
This is useful not only for fault diagnosis, but also for compliance reasons as any changes to the allowlists are logged.
As you can see, all our logs are JSON and therefore you can query them and pull information out easily. You can even do it on the Cloud Shell CLI using a combination of the aws command and jq. For an example, see the recipe here.
ix. MONITORING (see-thru) MODE
One of the toughest parts of adopting egress filtering is the initial phase. Planning, knowing what to actually put in your whitelists, trying to make sure they're not too open, while making sure your app and the underlying OS have everything they need to function correctly. Our monitoring mode is designed specifically to help with this and aid with the adoption.
We have an instance configured in see-thru in our demo environment, so let's look at the Security Groups attached to the instance called MyMonitoredApp-plugleak.
As we can see here, one of the groups is called MyApp-Monitored-Egress-plugleak, lets take a look at this, and the description on the outbound rule.

So we can see here that we have discriminat to indicate the DiscrimiNAT should read this config, followed by see-thru which tells DiscrimiNAT that the instances attached to this Security Group are in monitoring mode, followed by 2025-12-31 which is the date when the monitoring mode will expire.
When monitoring mode expires, the rule is disregarded and the traffic goes back to being blocked.
Let's connect to the monitored box using SSM (using the same method as the other instance) and run the following commands.
curl --head https://yahoo.com
curl --head https://graph.facebook.com
curl --head https://apple.com
curl --head https://youtube.com
You'll find they all work. It's as if DiscrimiNAT isn't there. So let's take a look at the logs. Navigate to CloudWatch -> Log Groups -> DiscrimiNAT -> flow, then search for yahoo.com.
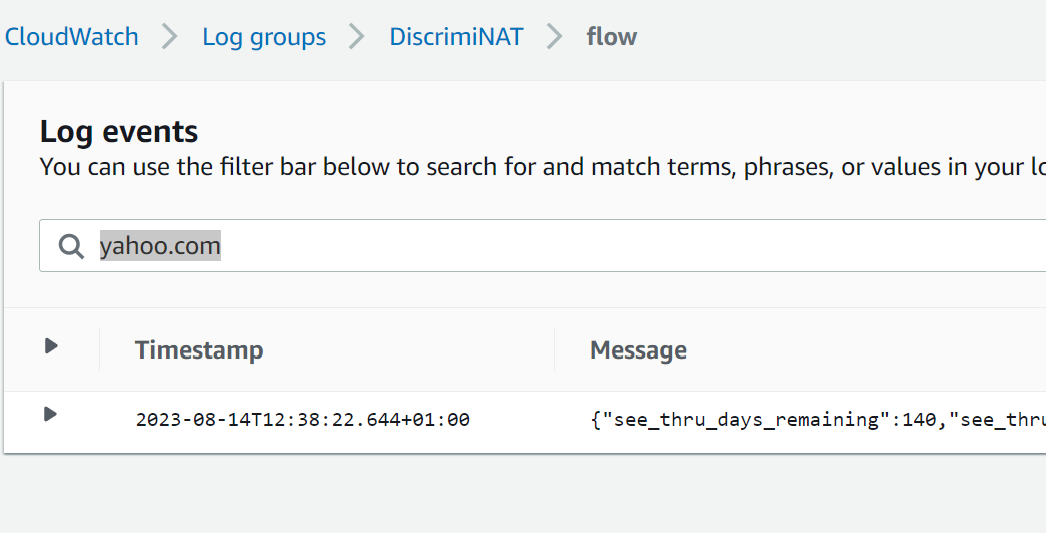
Let's expand that log entry.
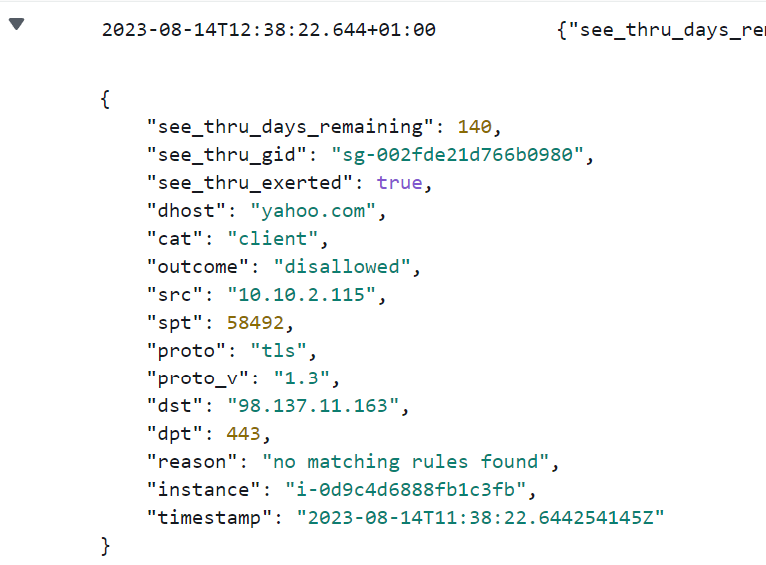
You may notice that there are extra fields in this log entry compared to the others we've looked at. These are see_thru_exerted, see_thru_gid, and see_thru_days_remaining. This is an easy way to tell that this log entry comes from a monitored group. Let's go through what these mean.
see_thru_gid: this tells you which Security Group this log entry has come from. So if you have multiple apps, all in monitor mode, you can still tell which is which.
see_thru_days_remaining: How many days there are until the monitoring shuts off and the traffic starts being blocked as normal. (Note, we do not use 0. The last day is 1 and the first non-working day is -1.)
see_thru_exerted: Did the object (eg. an instance or a lambda) needed to have the monitoring mode on to be able to access this host? For example, if there is another Security Group attached to it allowing it through, then this value would be false. If this has been set to true then this traffic would not have been allowed through under normal circumstances.
Using an aws logs command, you can pull through all the hosts that the machine connects to, and even more than that, using see_thru_exerted, you can choose to see which hosts haven't been allowed through via other Security Groups yet. For a fully worked out example, see the recipe here.
x. TEARDOWN
Teardown is just as simple as deleting the CloudFormation stack. Navigate to CloudFormation in the AWS console, find the stack named plugleak and delete it.
It will then tear down all the resources in the demo environment.
xi. NEXT STEPS
Hopefully now you've seen what DiscrimiNAT can do for your organisation, and how easy it is to configure.
Get a DemoExplore the Terraform module
DiscrimiNAT has an ever-growing feature set. If there is a feature you think is missing and that is blocking your adoption, please get in touch. It may already be on our roadmap. If it isn't and we think it's a good idea, it can be added to our roadmap.
Troubleshooting
Discovering FQDNs Recipe